- When man learns to look deep inside others, he learns to forgive.
- Everyone has a talent but the real talent is to control it.
- Some people just live to die while some others are dying to live.
- May be you'll win, but you see, I can't lose now.
- Common man is a waste produced by friction between powerful people.
- When u look yourself close enough, you don't see problems.. you see there is nothing to fix.
- If whole mankind was to be described by a single word, it would be 'stupid'.
- Our leaders fought for freedom and all they got was independence!
- It really pains sometimes, most of the other times pain is just an imagination.
- Are we really living or someone is playing SimCity up there?
- Many mornings I wake up and think "When was the last time I slept?"
- God doesnt need to be pleased or made happy. Just embrace the Power with all heart. Be a part of it, be God.
- No doubt everyone is unique, the problem is 99% of people are unique only in 1% of aspects.
- A good life is when you don't have to think about whether its a good life or not.
- Try being good and happiness runs away from you. Be good and happiness will follow you. I guess I'm still trying
- Knowledge makes life difiicult. If you don't know there is a tiger under you bed you'll sleep calmly. If you know there is a harmless tiger under your bed, you just can't sleep
- Even the ugliest truth is beautiful. No matter how painful, it provides solace to soul.
- Sinners are potential saints - Swami Vivekananda
- Two things drive a man, his family and his dreams. Give him a good family and respect his dreams and you'll get the best out of him.
- Everyone has something boring to talk about. When you find someone who is not boring at all, you know you are in love.
- May be the world will take me away from myself, but it can't take away my thoughts.. my dreams for they don't belong to this world.
- They planned, planned and planned and He smiled for it was all His plan.
- We are all defective pieces. Love is when two defective pieces fit into each other.
- There is already a machine on my desk, don't want another one on my chair.
- Don't say sorry or thanks till its really needed or it'll stop having any meaning.
- Killing is not really a sin, enjoying the killing is.
- I'm nothing but ashes.... a phoenix will rise again
- Many a times I don't want to be myself... but there are no better options.
- I don't hate myself, its just I am what I hate.
- Brilliance and madness are two sides of the same coin
- Money is not the only source of happiness, but its sure one of the best ones.
- You don't need a medical certificate to be mad... just be yourself.
- People people everywhere, trying to make a living, are they really living??
- Dilbert makes me feel better
- Behind every man there is a woman, and its upto her to make him successful or devastate him.
- I'm not a bad guy, just tired being a good guy.
- Be careful what you ask for, you might get it.
- Part1--If you can convert your thoughts into other's feelings, you are one of those who rules this world. Part2--What you feel are actually the thoughts of those who have been ruling this world. (agam)
Losing my religion... You don't need a medical certificate to be mad... just be yourself!
Thursday, November 26, 2009
Status messages
Saturday, September 19, 2009
Does Earth revolves aroud Sun ??
Does Earth revolves around Sun? Or is it the other way round? Yeah... I know Galileo told this four centuries ago that its Earth that revolves around Sun, but this doesn't means that I can't raise a doubt.. :D :P.
It was around two months back when I was working in my office and this popped into my head. I pinged my colleagues to know their opinion and it was declared that I was getting mad [eh eh eh]. Anyway, back to the point: does Earth really revolves around Sun? Me and everyone else has been taught this in school. But I remember reading another thing, that if two bodies are in motion then both of them are revolving around each other. So, when you say which one is revolving around the other one, it totally depends on the frame of reference. With respect to Earth's frame of reference isn't it absolutely correct that Sun, Moon and all other celestial bodies are revolving around Earth?
Just a thought, may be Sun and Earth are revolving around the combined center of mass (you can extend this for all planets). The center of mass would be closer to Sun so, its revolving in a small circle and the Earth is revolving in a bigger circle. So, when you look from the reference frame of one you can see the other revolving in an elliptical orbit!
Yeah, this all may not make any sense, but it just came back to my mind.. so I thought to put it down..
Monday, August 24, 2009
Broke my leg..
[edit] I don't know if anyone of those will ever read this post, but i really want to thank those guys who helped me to get to the auto rikshaw, without them i really would have been in a big trouble.
Sunday, July 26, 2009
Photo to vector art
Converting a photo into vector art. Using this method you can quickly and easily change a photo into vector art. Following is the final result of this tutorial:
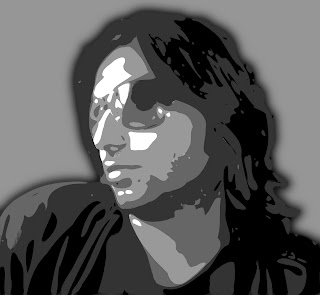
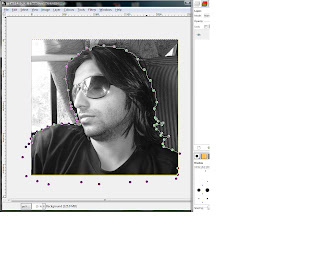
1] Open the image in GIMP. I wanted to have just myself in the final result, so used scissor select tool to crop myself out from the photograph
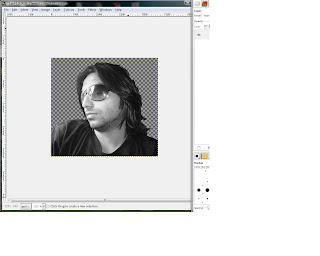
2] Use Filter | Blur | Gaussian Blur tool 2-3 times to smoothen the image.
3] Now use Colors | Posterize tool to reduce the number of colors. I used 5 colors, you can use less or more. After you apply the changes, the image looks very much like the final result, but its still not a vector image!
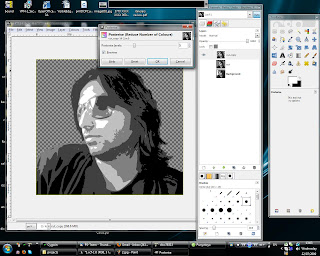
4] Next thing we'll do is creating paths from these different colors. Use the 'Select by color' tool to select all regions with black color in the image.
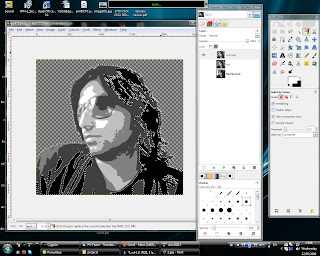
5] If you see closely, at many places there are very thin selections made which we probably don't want in the final image. We need to clear those selections before we proceed. Click on the 'Quick mask' button in the bottom-left of the image window. Use the Filter | Blur | Gaussian blur tool, to blur the quick mask. Blurring would cause very thin transparent regions in the quick mask to be filled.
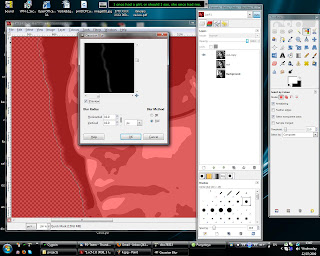
6] The blurring causes very thin transparent regions to be filled, but they are still not completely filled. Use Colors | threshold tool. Apply a threshold value such that the small regions are now filled.
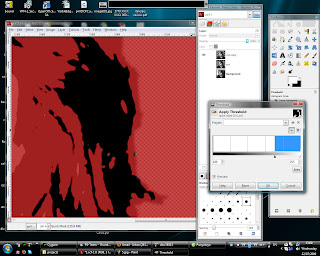
7] Click again on the quick mask button to get back to normal mode. You should see that most of the thin selections are removed. If there still are some regions that you want to deselect, you can do it manually. Because of the previous step, the size of selection is slightly reduced. Use Select | Grow tool to grow the selection by few pixels so that the selection is slightly bigger than the original black color region.
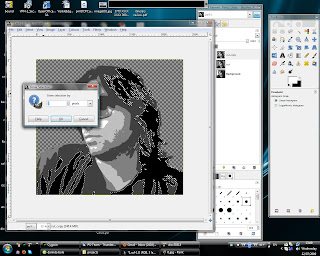
8] Select | To path tool will create a path using the selection, i.e. a path representing whole black region. Rename the path to '1'.
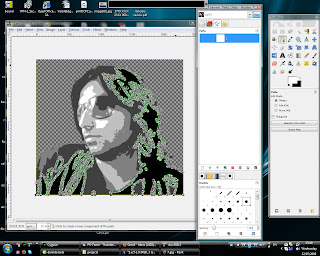
9] Do the same steps to create paths for all five colors, and rename the paths to 1,2,3,4,5.
10] The paths created are very complex and have a many nymber of nodes. We need to simplify these paths. Open the paths dialog, right click on each of the path and export them as .svg files.
11] Now open one of these .svg files in Inkscape and double click on the path [an object in inkscape] and press ctrl+L, this would simplify the path and reduce the number of nodes. Save the .svg file.
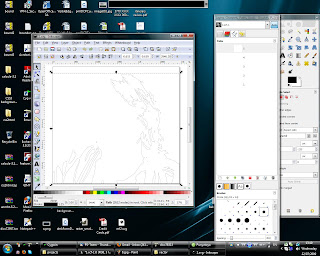
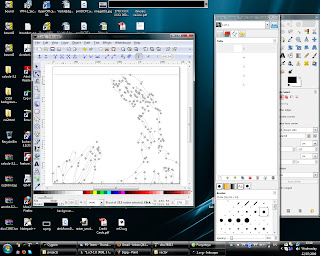
12] Do the same thing for other .svg files.
13] Rename the existing paths in GIMP or delete them and import the modified paths from the .svg files. To import right click in the paths window and click import.
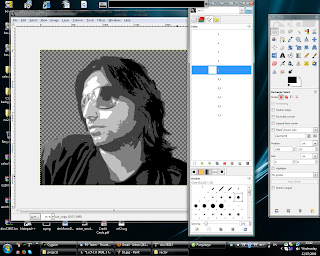
14] Double click on a path, this would show the path and select the paths tool in the toolbox. Click the select from path button to get a selection, create a new layer and fill the selection with some color. Similarly create a layer for all paths and fill them with different colors. I used the same 5 colors that the posterize tool used.
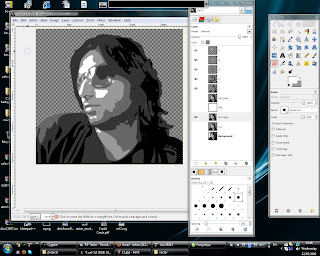
[15] Done! You can play around with other things, like I added a gray background and a shadow.

Sunday, July 12, 2009
Death
I am not sure if you are a movie freak(neither am I as much as it sounds) but what I realized is, every time I watch a good movie again, I see new things or I'd rather say I feel a new things. Last night I watched Gladiator 'again'. This time what caught my attention was death. I am not really afraid of dying because I know for sure one day I 'will' die, but what bothers me is will I be able to smile back at my death. I know that I am not ready right now. Recently I had two road accidents (believe or not but both of them were not my mistake, I am not a reckless driver :) ). Truly speaking, I felt nothing 'during' the accident, but the moment I picked myself up, I was thinking what if this was more severe and I was killed, and I wasn't smiling at the whole incident. Lucky guy I am, nothing happened to me except some minor scratches(touchwood), but what I am thinking now is will I be able to smile at my death when (whenever and however it comes) I'll face it?
Tuesday, May 5, 2009
Enhance colors using HSV components
Following tutorial shows how to enhance colors of a photograph.
There are several ways to enhance colors of a photograph. Two of the methods are really simple and just require a few clicks. I'll be focusing mainly on the third method that uses the HSV components.
Following are the two test images that I'll be using:
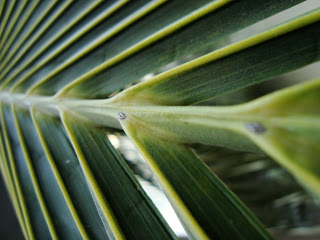
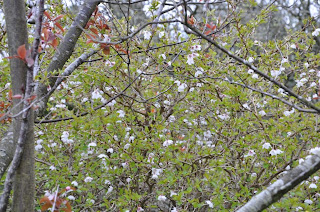
First method - using GIMP's inbuilt color enhance option
GIMP has an inbuilt option to enhance colors[ Colors | Auto | Color Enhance]. Sometimes this option is just enough to do the job but sometimes the output is not very satisfying, moreover it doesn't gives you any control over how much enhancement you need.
Following are the two images after applying GIMP's inbuilt color enhancement:
As you can see, the first image looks much better, there seems to be more scope of color enhancement in the second image.
Second Method - Color saturation
The second method is also pretty simple. We can increase the color saturation in the image to get the desired result. Open the Hue-Saturation dialog [Colors | Hue-Saturation ]. Make sure primary color is selected as "Master". Now increase the saturation using the slider to enhance the colors. You can also play with the lightness to get the desired result.
Following are the results that I got after applying this method on the original images
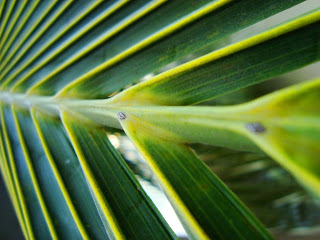 For this one I used a saturation value of 80, and lightness value of 5
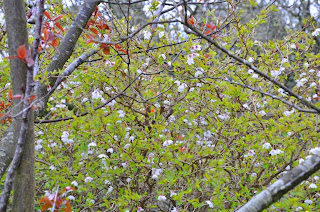 For this one I used a saturation value of 50
Third method - Using HSV components
This method gives us a little more control over how the saturation and the lightness is changed and with some trial and error it can give us much better results. If you don't know what is HSV color model, you must read a little about it.
1] First thing to do is to decompose the image into its HSV components. To do this select [ Colors | Components | Decompose ]. Chose the HSV color model, and check the "decompose as layers" checkbox. Click "ok".
2] You should get another image with 3 layers representing the H(ue), S(aturation), V(alue) components of the original image.
3] We'll be working only on the "saturation" and the "value" layers.
4] First, the saturation layer. You can use the levels or curves to enhance the saturation layer. To see the effect of the change you made, select [ Colors | Components | Recompose ], this would recompose the image using these layers.
I used levels to change the saturation layer. Following is the screenshot of it:

This is what I got after recomposing the image:
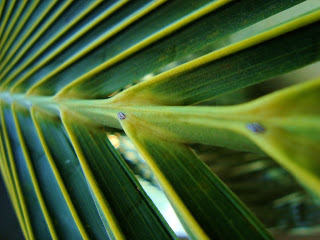
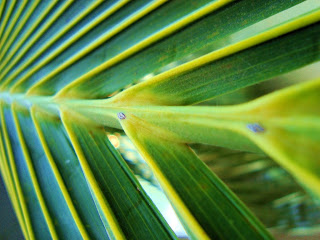
5] Now, the value layer. This layer represents the intensity of the colors in the image. I used the levels to enhance this layer. Following are the settings I used:

This is what I got after recomposing the image:
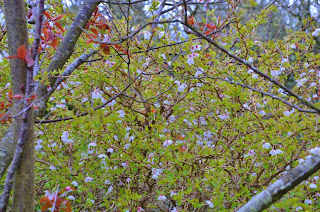
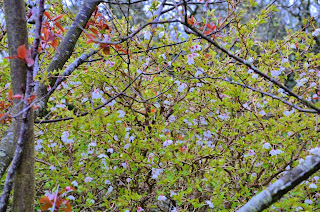
Similarly, I applied the same steps as above on the second image. Following are the screenshots of the intermediate steps and the final result:


Tuesday, April 28, 2009
Man is an animal
To me it seems man created this whole concept of society just to cater to his anti-social nature. How can man remain anti-social when there is no society? Man setups all these rules for society and then just goes ahead and bashes them. What's the purpose of society? The purpose of society is supposed to be people coming together to support each other and make a better living. What really is happening in the name of society? People coming together to get benefit at the cost of others. They don't want to be better than others, they just want to prove that they are better than others. They'll look for things to ridicule other people, show them down, prove their own superiority. They love to criticize other countries, other religions, other castes, other societies, as if they are the chosen ones bestowed upon with all the superiority.
I think it would have been better if man was just an animal rather than a social animal.
p.s. Gupta ji, in the comment of last post you said "The day you will see a pig and human as equal, you will be a happy person". May be pigs are happier than men, probably they see us no different from them. :D
Monday, April 13, 2009
The more we learn the lesser we know
All the time I see the learned people struggling every day to learn more, to do more, to get more, behaving as if they got nothing, no time to take a time off, while the unlearned ones keep on enjoying their ignorance. The more we learn seems to take away much more from us. Everytime we learn something it opens up doors to many other things that we don't know and make us desperate for knowing more. The question is learning might be making us desperate to know more, but how does it cause to know less?
Lets say, knowing something gets you a positive point, and not knowing something gives you a negative point, the things that you don't know about (not even that you don't know it) gets you a zero. You might ask, whats the basis for this scheme? Well, I chose this scheme because I assume absolute knowledge is bliss, because when you know everything, you don't have to worry or fear, think or do anything about anything and your mind and soul are at peace, so knowing something gets you a positive point, a maximum score indicates bliss. As I see in my daily life, being aware of something that you don't know causes some negative effect that takes you away from this bliss, so a negative point for it, While not knowing about something (not even that you don't know it) just doesn't causes any effect, so a zero.
When a child is born he is at zero level, he knows nothing about anything. As he learns some new thing [getting a positive point for it :)], he learns about many more things that he doesnt know [and thus getting a negative point for each of them :(], the net result is: he moves to a negative level. As this *learning* continues he collects some positive points and many more negative points thereby continuously moving towards negative side, away from bliss.
Knowledge is boundless (and so, bliss is impossible, but a high positive score may be close to bliss), so a state never comes when a person is already aware of everything he doesn't know so that he can fetch no more negatives and then just continue moving towards bliss learning about everything he doesn't know. Everytime we learn something new, this boundlessness of knowledge just keeps us moving away from bliss or the absolute knowledge, and so "The more we learn the lesser we know".
[This post is dedicated to the highest positive scorer: Gupta ji]
Thursday, April 2, 2009
Put yourself on banner
GIMP version - 2.6.4
Image size - hoarding (1024x768), Casino royale poster(799x403)
Here are the two images that I started with

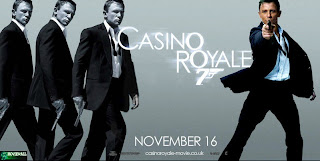
..this is what I ended up with

Following is what I did:
1] Open up the hoarding image in GIMP. Now, before doing anything else we need to make sure that the image that we are going to put on the hoarding is in (almost) same aspect ratio as the hoarding. To get the aspect ratio of the hoarding use the 'Measure Tool' to get the height and width of the hoarding, as shown below:

For the images I used the aspect ratio came out 2:1 which almost same as the image, so I didn't have to crop the image. If the ratio is different, make sure you crop the image before putting it on the hoarding.
2] Open the second image as layer. I'll call this layer as "poster layer". To put the image on the hoarding, use the 'Perspective Tool'. Reduce the poster layer opacity and in the perspective options select 'Preview' as 'Outline', this is not necessary to do, but it will help.

3] This is what I got after applying the perspective transformation.

4] Now, we need to do some clean-up stuff. As you can see the corners of the hoarding are round, there are few cables infront of the hoarding, a light at the bottom. Add a layer mask to the poster layer. Reduce the layer opacity so that we can see the hoarding border through it. Select the layer mask and paint black color over the area that we don't want to be visible. You can zoom in to do it neatly

5] This is what I got after rounding the corners:
 6] Now, the cables: hide the poster layer, select path tool to create a path over the cables. Select the layer mask and "stroke path" with black color. I guess most of the cables in front of any such hoarding should be easy to handle.
 Similarly, do the same thing for other cables. This is what I got:
7] Almost done, just the final touch. The colors in the poster look too bright compared to the surroundings. Reduce the brightness and contrast a little for the poster layer.
 8] And then, here is the final result
Monday, February 16, 2009
Image to polaroid collage
Following tutorial is to get a polaroid collage effect on an image. What I am going to do is just place some randomly rotated polaroid frames that we will create in step [3]. To give it a little realistic look we will use shadows and Curve Bend tool.
GIMP version: 2.6.4
Image size: 1024 x 768
Before we start just preview of what I finally got:

1] Create a new image in GIMP of size same as original image (i.e. 1024 x 768 here). The idea is to create all the frames and finally put the original image in the background.
2] Hide the background layer and create a new transparent layer which is 300px wide and 400px high, and name it "frame".
3] Now add little off-white borders to the layer. I used (240, 240, 240) color. Make the borders 10px wide on left, top and right side and 30 px wide on the bottom side. You can use the rectangle select and the bucket fill tools. After drawing the borders you must have something like this:
4] Now create a transparent layer, and name it as "collage". We will use buffer to temporarily put a frame, then rotate and distort it a little, and then put on the "collage" layer.
5] Lets start with the first frame. Select layer "frame" hit Ctrl+A to select the frame that we made. Select layer "buffer" and hit Ctrl+V to paste, but don't merge down the floating layer yet. Select Filters | Distorts | Curve Bend, and slightly bend the upper curve, press copy button to copy the same curve to the lower region. Press ok to apply the transformation. You should get something like this:
6] Now, take the rotate tool and rotate the floating layer with some random amount.
7] Select Filters | Light and Shadow | Drop Shadow, and drop a shadow. I used the x-y offset as 5 and blur radius as 8, opacity as 80.
8] Now merge down the floating layer on the layer "buffer". Rearrange the layers as "buffer", "Drop Shadow" and "collage". Merge down the "shadow" layer to the "collage" layer. Select the layer "buffer", take the "fuzzy select" tool and click inside the blank area in the frame. Now merge down the "buffer" layer to the "collage" layer. Now press delete to delete the selected area. This is what I got after this step:
9] As you would have noticed that the "buffer" layer is lost. Create another "buffer" layer. and repeat the steps 5-6-7-8 several times, with frames rotated with different angles, distorted with different amount, and pasted at different places.
10] After repeating steps 5-6-7-8 several times, I got this:
11] Now, just place the original image in the background. To get better results you may place the original image in the background before and then put the frames according to the image.

Tuesday, January 27, 2009
We are all Sick!
Did I say.. sick?
Yes I did!
Oh..Really? Is it so..What kind of sickness?
Nature created us for two reasons survival and growth of race, it seems to be the way with every other species.
So? what it has to do with sickness? Man seems to be doing a good job.
Oh yeah.. man seems to be doing a good job, but not as good as other animals.
What? Do I mean other animals are doing better than man. I must have lost my mind.
That's it, that's the sickness I'm talking about.
What? Do I mean man has gone crazy?
Yeah, in a way. Man would have done a great job, but he got infected.
Infected with what?
With emotions! He started to feel things other than survival and growth of race.
He started feeling Love, Hate, Pride, Grief and it let everything to this imbalance. Every other species tries to maintain equilibrium, they eat, sleep, reproduce, do everything in balance. They don't kill each other until and unless to survive or to reproduce.
I guess I am right, everything man does just makes the situation more worse. Man is destroying this beautiful Earth which otherwise would have been much more beautiful than it is now. We are destroying everything. We all really are sick.
Tuesday, January 20, 2009
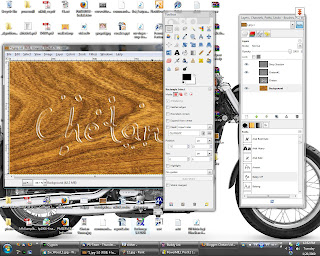
Cool Water Text Effect
Following tutorial is to create a water text effect.
A quick google search got me the following image of a wood surface on which we will add our water text effect.
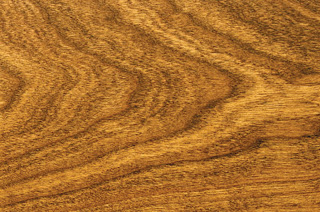
This is what I got finally
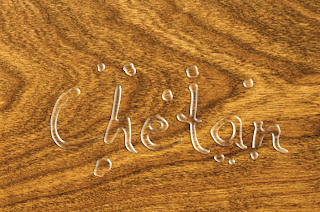
image size: 1024x678
GIMP version - 2.6.2
Following are the steps that I followed
1] Open image in GIMP.
2] Add a new text layer and add text in white color with some hand-writing font so that it looks more realistic.
3] Take a white brush and paint some spots that we'll turn into water drops like the following image:
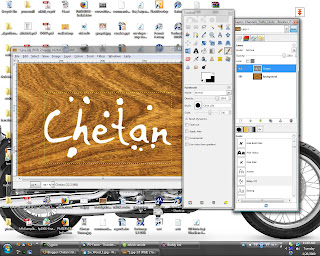
4] Set layer size to image size.
5] Duplicate the layer with text (Lets call them t1 and t2).
6] Right click on layer 't2' in layers dialog and select 'Alpha to Selection'. This would select the non transparent region.
7] Switch to channel window and add a new channel. Set channel opacity to 100, and tick 'Initialize from Selection' option. Now deselect all and blur the channel three times with blur raius as 7, 4, 1. Then hide the channel.
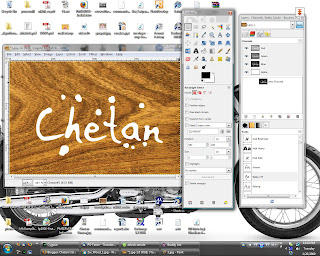
8] Now we will add some lighting effect to the layer 't2' using the channel we created as bumpmap. You can use following settings:
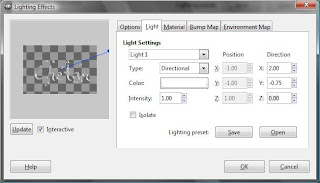
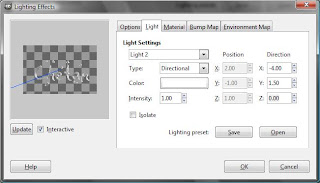
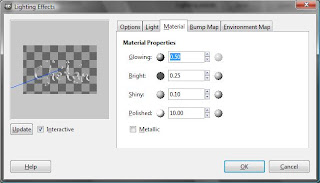
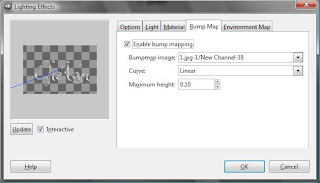
After applying the changes you must have something like this:
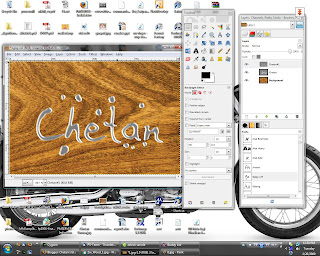
9] Select layer 't2', Lock the alpha channel (this option is towards top of the layers dialog), then blur the layer with blur radius as 4px. Unlock the alpha channel.
10] Select Colors | Color to Alpha, and choose a mid gray color. This should give you something like this
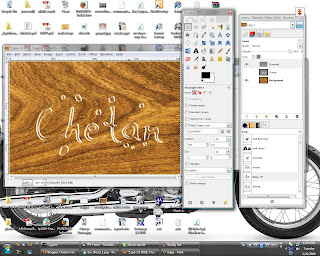
11] Now we will add some shadow to give a little more realistic look. Right Click on the 't1' layer and select 'Alpha to Selection'. Drop a shadow offset to x:-2, y:1 and alpha set to 50%.
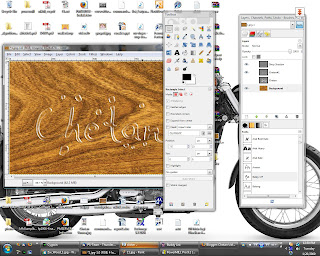
12] There is too much *white* in the image, select the 't2' layer, Colors | Curves, select channel as Alpha and slightly move the curve downwards till you have something like this:
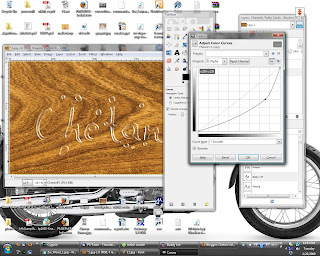
13] We are almost done, just need to add a slight refraction effect. Select layer 't1' and again make a selection from alpha. Now select the wooden surface layer (keeping the selection). Select Filters | Distort | Whirl and pinch, set angle to 60, radius to 2. Select Filters | Distort | Lens Distortion, Set Main:-25, Zoom:2.
14] Done!! This is what I have finally:
