Converting a photo into vector art. Using this method you can quickly and easily change a photo into vector art. Following is the final result of this tutorial:

1] Open the image in GIMP. I wanted to have just myself in the final result, so used scissor select tool to crop myself out from the photograph
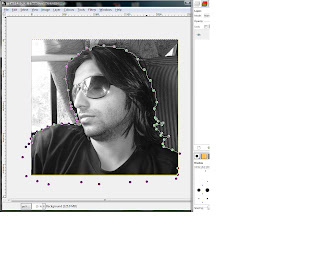
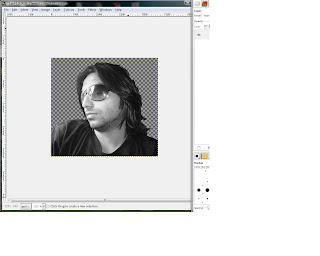
2] Use Filter | Blur | Gaussian Blur tool 2-3 times to smoothen the image.
3] Now use Colors | Posterize tool to reduce the number of colors. I used 5 colors, you can use less or more. After you apply the changes, the image looks very much like the final result, but its still not a vector image!
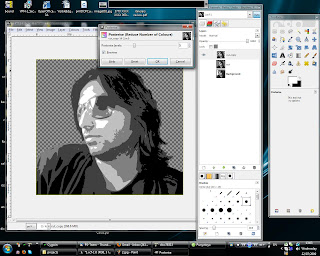
4] Next thing we'll do is creating paths from these different colors. Use the 'Select by color' tool to select all regions with black color in the image.
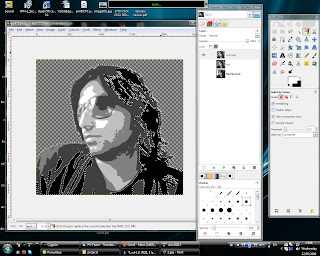
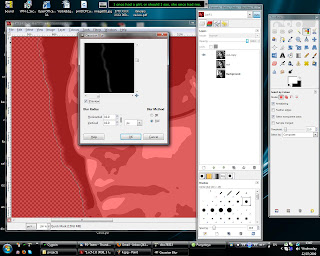
5] If you see closely, at many places there are very thin selections made which we probably don't want in the final image. We need to clear those selections before we proceed. Click on the 'Quick mask' button in the bottom-left of the image window. Use the Filter | Blur | Gaussian blur tool, to blur the quick mask. Blurring would cause very thin transparent regions in the quick mask to be filled.
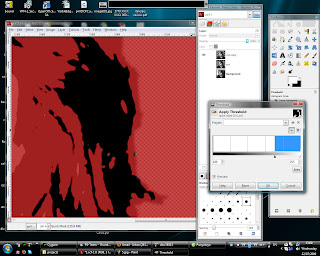
6] The blurring causes very thin transparent regions to be filled, but they are still not completely filled. Use Colors | threshold tool. Apply a threshold value such that the small regions are now filled.
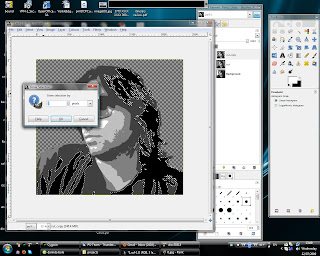
7] Click again on the quick mask button to get back to normal mode. You should see that most of the thin selections are removed. If there still are some regions that you want to deselect, you can do it manually. Because of the previous step, the size of selection is slightly reduced. Use Select | Grow tool to grow the selection by few pixels so that the selection is slightly bigger than the original black color region.
8] Select | To path tool will create a path using the selection, i.e. a path representing whole black region. Rename the path to '1'.
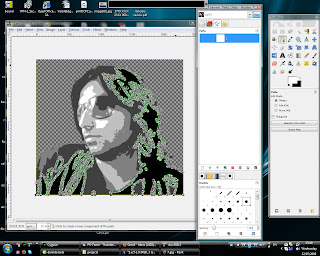
9] Do the same steps to create paths for all five colors, and rename the paths to 1,2,3,4,5.
10] The paths created are very complex and have a many nymber of nodes. We need to simplify these paths. Open the paths dialog, right click on each of the path and export them as .svg files.
11] Now open one of these .svg files in Inkscape and double click on the path [an object in inkscape] and press ctrl+L, this would simplify the path and reduce the number of nodes. Save the .svg file.
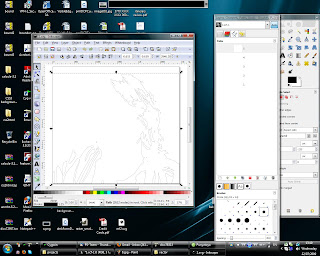
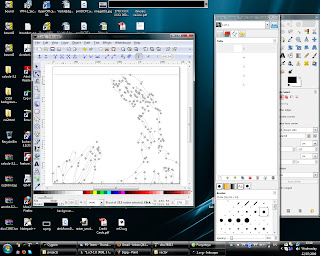
12] Do the same thing for other .svg files.
13] Rename the existing paths in GIMP or delete them and import the modified paths from the .svg files. To import right click in the paths window and click import.
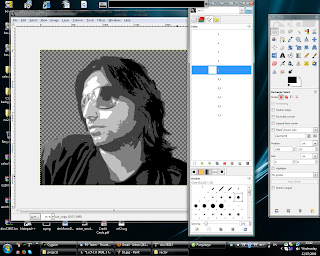
14] Double click on a path, this would show the path and select the paths tool in the toolbox. Click the select from path button to get a selection, create a new layer and fill the selection with some color. Similarly create a layer for all paths and fill them with different colors. I used the same 5 colors that the posterize tool used.
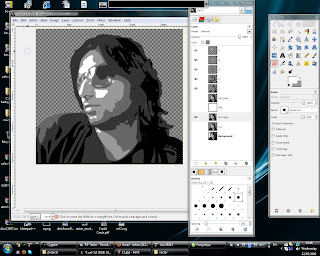
[15] Done! You can play around with other things, like I added a gray background and a shadow.

Sahi hai chhore... one after very long... no GIMP or any other s/w for me rite now :( else would have tried it out...
ReplyDeleteVery nice! I have some definite uses for this technique. Thank you for posting it.
ReplyDeleteThis comment has been removed by a blog administrator.
ReplyDeletenice tutorial :)
ReplyDeleteuse gimp too and very love it :)
great tutorial
ReplyDeletehttp://www.designpy.com
graphic and design sharing website
Great tutorial, thanks. Just one question which I can't figure out - how do you manually deselect. I've searched and can't work out how to do it.
ReplyDeleteTa
Deselecting manually means use ctrl key with some select tool to deselect or switching to quick mask mode and filling the area you want to deselect.
ReplyDeleteThis comment has been removed by a blog administrator.
ReplyDeletehey Izzy... no spamming on my blog...!
ReplyDelete@chetan - thanks
ReplyDeleteI enjoyed this tutorial! Thank you very much!!!
ReplyDeletethis is super duper stuff man.. tried it out and was awsum.. thx a lot!!!!!! :) :)
ReplyDeleteThanks, I'll try it out
ReplyDeleteKind regards,
Ryurules
thanks mate,
ReplyDeletethese steps were very useful. I was asked to do this for a printing company so I realised that in inkscape outline became too blury with Ctrl+L so next time I didn't apply it. It worked. Again many thanks.
This looks easy enough for even a beginner like me to try. Thank you.
ReplyDelete...so, how do you actually export the final, color filled, image as a vector graphic? When I try to export it it say .svg is a non-existant image format.
ReplyDeleteI need to get inkscape. Boo!
ReplyDeleteI need to get inkscape. Boo!
ReplyDelete