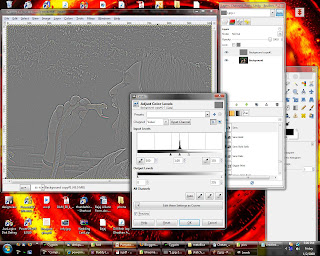
I used GIMP 2.6.2 and a 1024x768 sized image.
Original Image:

Final Image:

Following are the steps (including the ones I learned from other tutorials)
1] Open the image in GIMP
2] Duplicate the layer
3] Gaussian blur the top layer. I used the blur radius as 5 pixels.
5] Invert colors of the blurred layer, and set its transparency to 50%.
6] You should have something like this.

7] Merge down the top layer.
8] Open colors | Levels, set the minimum and maximum input levels as 100 and 155 as below.

9] Desaturate the layer
10] Open Colors | Levels, adjust the input levels so as to get something similar to the following

11] Now Duplicate this layer. Hide the top layer and select the second one.
12] Select Filters | Blur | Motion Blur. Select blur type as Linear, length as 10 angle as 135. Repeat motion blur with angle changed to 315. You should get something as:

13] Unhide the first layer set its transparency to 20%. Merge down the top layer with the blurred layer.

14] Select Colors | Contrast. Increase the contrast slowly till image looks more like a pencil sketch. I increased the contrast to a value of 15, to get the following result

15] Now we need to add some more random pencil strokes. Add a new transparent layer of size 512x384 i.e. of half width and height of the image.
16] Select Fileters | Noise | Hurl. Select a random seed. Set randomization% to 10 and repeat to 1. This should add some random dots to the layer.

17] Select Layer | Scale layer. Scale the layer to image size select interpolation as cubic. Move the layer if necessary to overlap the image correctly. You will have something like this

18] Select Colors | brightness and Contrast. Set Brightness to minimum and Contrast to maximum.
19] Now again apply motion blur on this layer as previously. But keep the length as 20.
20] Again merge down the blurred layer.
21] Now, Select Colors | Brightness-Contrast. Reduce the brightness and increase the contrast to get something like this:

22] Now you can apply canvas from Filters | Artistic | Apply Canvas, to give it a more realistic look. Here is the final image that I got after applying canvas:

Done!!
On steps 15-17, I've created the new layer and applied the 'hurl' filter than scaled it to image size. The layer is offset from the the others I have. How do I go about moving the layer so that it averlaps the ones below it? I can't grab it and move it with the move tool since there's nothing in the layer to move...
ReplyDeleteNvm, I figureed it out... :P Great tut, thanks!!
ReplyDeleteVery nice tut, thanks!
ReplyDeletenice tut easily understandable
ReplyDeleteOh, I love editing pictures this way:) Looks great!
ReplyDeleteFree online TV