I used GIMP 2.6.2
image resolution 1024x768
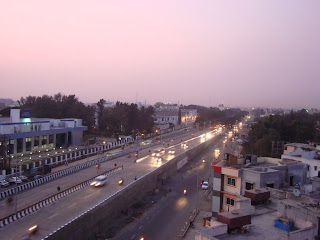
Original image
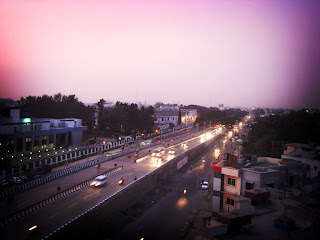
Final image
1] Open your image in GIMP.
2] Select whole photo using 'Select | All'
3] Shrink the selection by 75 pixels (Select | Shrink)
4] Feather the selection by 300 pixels (Select | Feather)
5] Invert the selection (Select | Invert)
6] Create a new transparent layer and select it
7] Take the gradient tool, set shape to 'Radial', and add a white to black gradient from center of phot to the bottom side. You must get something like this:
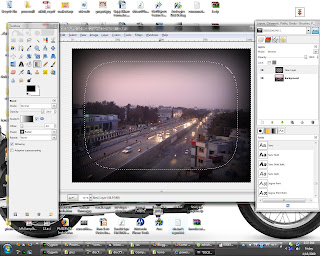
8] Set the gradient layer mode to overlay.
9] If the border looks too dark, reduce the opacity of the gradient layer or ifs less dark then duplicat the gradient layer (make sure the duplicate layer is also set to overlay mode). I got the following result after duplicating the layer.
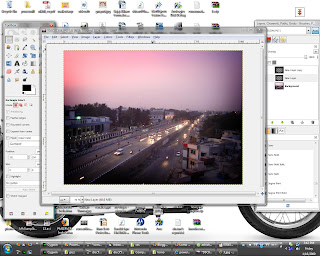
10] Flatten the image (Image | Flatten Image)
11] Open the Color curves dialog (Colors | Curves), set channel to values and apply an 'S' curve, something like this:
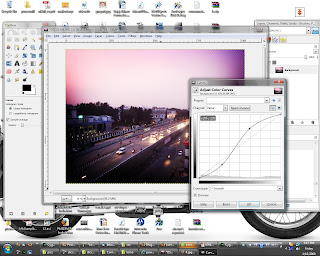
12] Apply the changes.
Done!!
heyy thank u so much.
ReplyDeletei really like this effect
as it is proper Gimp tuts are hard to come by :D
Thank you so much for this tutorial!!
ReplyDeleteIt's easy to use and i absolutely love it!
(plus it let me know the name of an effect I love)
I agree, thanks a bunch for your help!
ReplyDeletethanks for the tips!
ReplyDeleteGreat post, thanks! Love the Lomo effect.
ReplyDeleteWhere is the gradient tool?
ReplyDelete