Following tutorial is to create a water text effect.
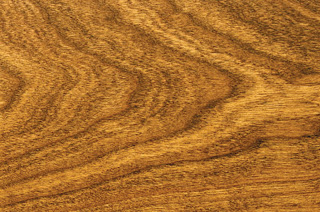
A quick google search got me the following image of a wood surface on which we will add our water text effect.
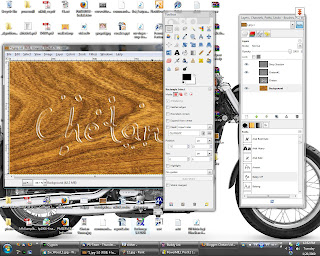
This is what I got finally
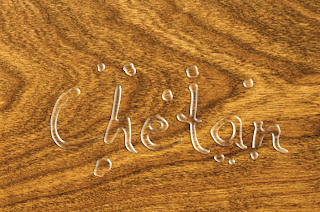
image size: 1024x678
GIMP version - 2.6.2
Following are the steps that I followed
1] Open image in GIMP.
2] Add a new text layer and add text in white color with some hand-writing font so that it looks more realistic.
3] Take a white brush and paint some spots that we'll turn into water drops like the following image:
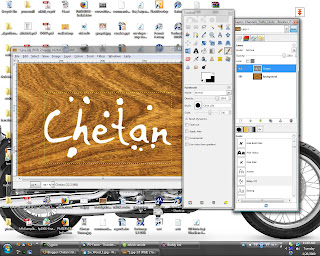
4] Set layer size to image size.
5] Duplicate the layer with text (Lets call them t1 and t2).
6] Right click on layer 't2' in layers dialog and select 'Alpha to Selection'. This would select the non transparent region.
7] Switch to channel window and add a new channel. Set channel opacity to 100, and tick 'Initialize from Selection' option. Now deselect all and blur the channel three times with blur raius as 7, 4, 1. Then hide the channel.
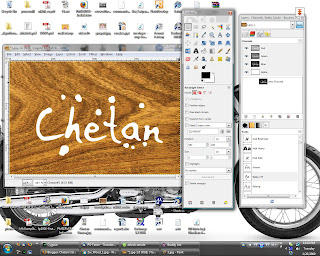
8] Now we will add some lighting effect to the layer 't2' using the channel we created as bumpmap. You can use following settings:
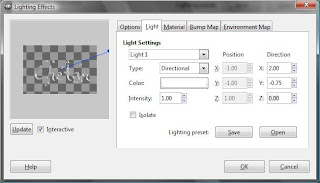
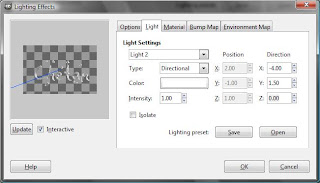
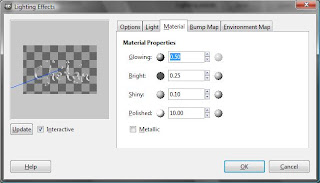
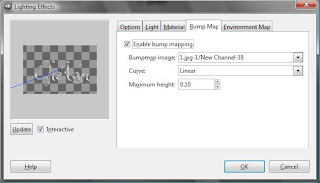
After applying the changes you must have something like this:
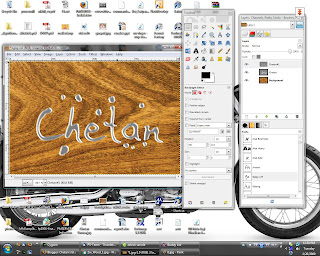
9] Select layer 't2', Lock the alpha channel (this option is towards top of the layers dialog), then blur the layer with blur radius as 4px. Unlock the alpha channel.
10] Select Colors | Color to Alpha, and choose a mid gray color. This should give you something like this
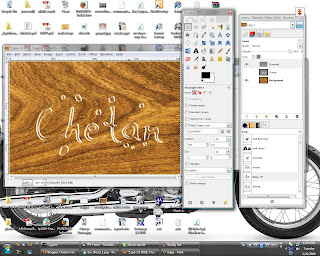
11] Now we will add some shadow to give a little more realistic look. Right Click on the 't1' layer and select 'Alpha to Selection'. Drop a shadow offset to x:-2, y:1 and alpha set to 50%.
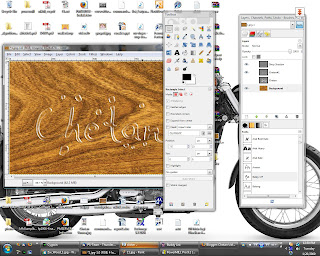
12] There is too much *white* in the image, select the 't2' layer, Colors | Curves, select channel as Alpha and slightly move the curve downwards till you have something like this:
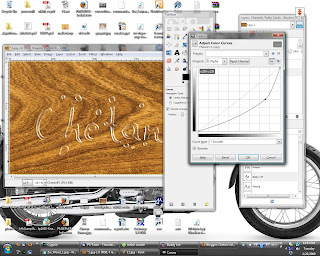
13] We are almost done, just need to add a slight refraction effect. Select layer 't1' and again make a selection from alpha. Now select the wooden surface layer (keeping the selection). Select Filters | Distort | Whirl and pinch, set angle to 60, radius to 2. Select Filters | Distort | Lens Distortion, Set Main:-25, Zoom:2.
14] Done!! This is what I have finally:
kool...
ReplyDeletebtw, tumhare GIMP mein specialiasation karne ka irada hai kya?
Peter ko competition de rahe ho ;-)
Good work Chetan, I think after few months your blog can be referred instead of GIMP documentation/ manual.
ReplyDeletehehe.. seems you haven't seen GIMP manual :P
ReplyDeleteDude! Brilliant GIMP tutorials! I am a fan of GIMP too!
ReplyDeleteYou should also post on instructables.com !
Sweet, i made this with it,
ReplyDeletehttp://supersyko.deviantart.com/art/Half-life-2-water-updated-117540797
Really appreciate it!
i dnt mean to be a bugg...but am having some huge problem..wen i get to step 6-step 8..theres no change in the pictures like in ur screen shots
ReplyDeletewen u deselect the chnnels...shud i reselect the new channel to apply the 2 gaussian blur 3times to it
ReplyDeletefrom what am getting... i tink the rendering and use of lightning effects has bin change in gimp2.6.3 if u wnt to see the effects after apply the ligthning effect..tel it to create a new trasparent layer from th first dialogue u see in the lightning effects dialogue...and step 10 downwards didnt show effect after trying them will kip trying till i find a solution tanks
ReplyDeleteThe step 7 says to "deselect" i.e. lose the current selection shown by the marching ants, and not to deselect the channel. Keep the new channel selected, and deselect everything on the new channel, so that the whole channel is blurred.
ReplyDeleteoh ok...tanks....truely appreciate the help
ReplyDeleteThis comment has been removed by the author.
ReplyDeleteA solution is found..as to does who may hav problem with this..as i am...the real solution apart from what Chetan jst said...it seems to be able to get such an effect fully shown on gimp 2.6.3 is to nt only make sure that the channel u created is stil selected but also to select the remaining channels i.e also select the red,green,blue and alpha channel before blurring it preferable using Gaussian blur with the values 7,4,1 but also make sure that as Chetan said...it is the deslection of the layer i.e removal of the matching ants...which can be done by jst going to "Select" menu and click on "None"
ReplyDeletewhy is it that it's SO HARD to follow your tutorail? could you explain it more..?
ReplyDeletethis is really confusing????????????????
ReplyDeleteSorry jen05, kainoa but I am no professional tutorial writer! Its just that sometimes I find something interesting and like to share with others because that's how I learnt these things..
ReplyDeleteI tried my best to keep things as clear as possible, but I am no expert.. I am sure this might be causing some problems.
What I'll suggest is try it a couple of times more, try experimenting where things are not clear. And if you crack it or find some other better way of doing things, please post a comment or if you write a post somewhere else do post a link in the comments so that others and myself can learn from it..
dude i tried it like a million times!!!!
ReplyDeleteCan you tell specifically where you are having trouble.. may be i could help..
ReplyDeletemaking the words look like they are water.
ReplyDeleteThis comment has been removed by the author.
ReplyDeleteI was expecting something more specific!
ReplyDeleteAnyway, xgeous created a video tutorial based on my tutorial, you can have a look, may be it'll be of help to you:
http://www.youtube.com/watch?v=7V9E7wZGnBE
Hi Chetan,
ReplyDeleteI tried your tutorial, but mine appears a little white? See http://h2opumps.com.au
How do I remove the white-ness?
Jason.
Looks like something went wrong at step 7, 8 or 9.
ReplyDeleteTry again!! You can also refer to the video tutorial mentioned in my last comment.
thanks, I'll check it out.
ReplyDeleteoi, i really can't find that font !!!!!! send a link please
ReplyDelete